The Pros and Cons of Furniture Upholstery

The Pros and Cons of Furniture Upholstery : Creating a Comfortable and Stylish Haven

Furniture Upholstery has graced homes for centuries, offering a luxurious and inviting alternative to hard, unforgiving surfaces. From plush sofas to cozy armchairs, these pieces add a touch of comfort and style to any room. But before you sink into the allure of an upholstered haven, it’s important to weigh the pros and cons to ensure it fits your lifestyle.

The Comfort Factor: Sinking into Bliss

One of the biggest advantages of upholstered furniture is undeniable comfort. The soft padding provides excellent back and leg support, making it ideal for relaxing after a long day. Whether you’re curling up with a good book or enjoying a movie night with family, upholstered furniture creates a cozy environment that invites you to linger.

The level of comfort can be further customised based on the type of padding. Down and feather cushions offer a luxurious sink-in feel, while firmer foam cushions provide better support for long periods of sitting. Additionally, some upholstered furniture features removable cushions, allowing you to adjust the firmness or even flip them for even wear.

Beyond Seating: Comfort isn’t limited to sofas and armchairs. Upholstered ottomans provide a comfortable place to rest your feet, while upholstered benches offer extra seating and can double as storage solutions. Upholstered headboards can transform your bed into a luxurious retreat, adding a touch of softness and warmth to your sleep sanctuary.

Style for Every Space: From Classic to Contemporary

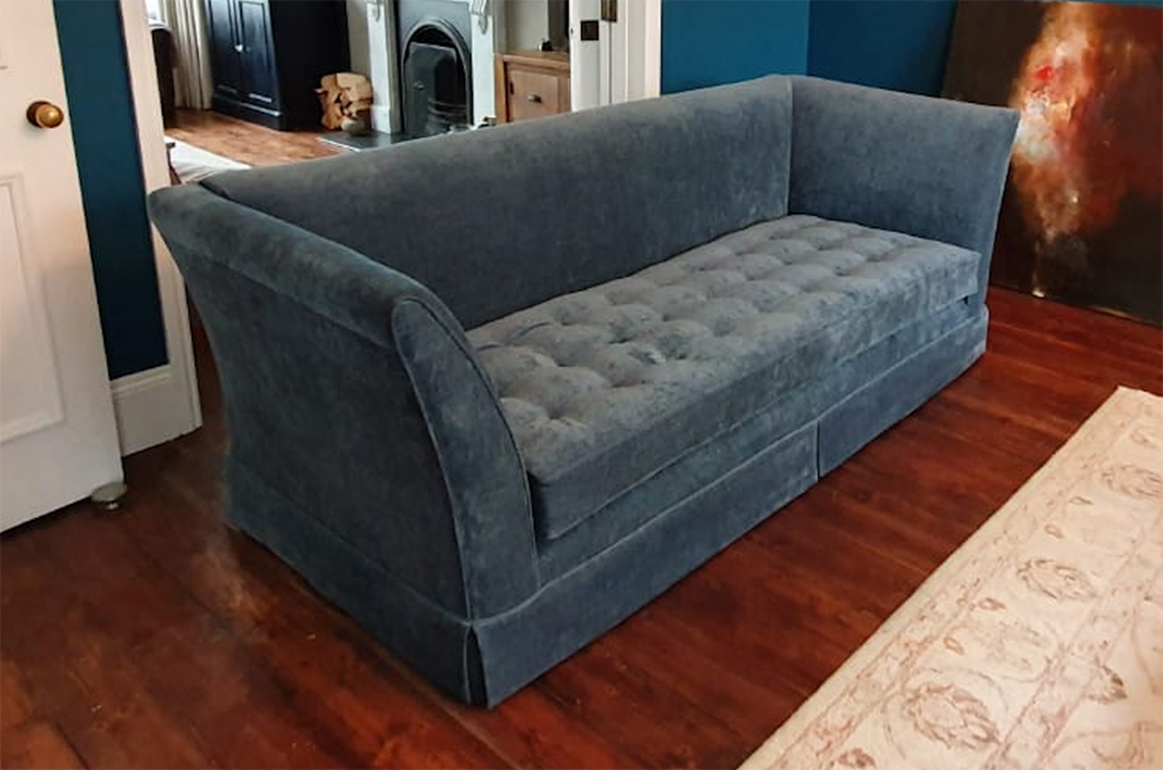
Upholstered furniture comes in a vast array of styles, materials, and colours, offering endless possibilities to complement your décor. From classic Chesterfield sofas with button-tufted detailing to sleek, modern sectionals with clean lines, there’s a style to suit every taste.

Material Matters: The fabric choice significantly impacts the look and feel of your furniture. Leather offers a timeless elegance and is known for its durability. However, it can be more expensive and might feel cold to the touch. Fabric upholstery provides a wider range of options, from the soft and inviting texture of velvet to the more stain-resistant properties of performance fabrics.

Colour Considerations: Colour plays a vital role in setting the mood and tone of your space. Bold and vibrant colours can add a pop of personality, while neutral tones offer a calming and versatile base. Consider the overall colour scheme of your room when choosing the upholstery fabric.

Mixing and Matching: Upholstered furniture allows for creative mixing and matching. You can create a cohesive look by using the same fabric for different pieces or introduce visual interest by combining complementary colours and textures.

Maintenance Matters: Keeping Your Furniture Upholstery Looking Fresh

While undeniably comfortable and stylish, upholstered furniture requires some degree of maintenance to keep it looking its best. Here are some key considerations:

  • Cleaning: Regular cleaning with a vacuum cleaner helps remove dust, dirt, and allergens. Spot cleaning spills promptly is crucial to prevent stains from setting in. Different fabrics may require specific cleaning methods, so always check the manufacturer’s instructions.
  • Sun Protection: Direct sunlight can fade upholstery fabrics over time. Consider placing furniture away from windows or using curtains for protection.
  • Pet Protection: If you have pets, choose a durable and stain-resistant fabric. Regularly brush your pet’s fur off the furniture to minimise shedding and potential scratching.

Professional Cleaning: For deep cleaning or stubborn stains, professional upholstery cleaning services are recommended. This can help revive the look of your furniture and extend its lifespan.

Durability and Lifespan: Investing in Quality

The lifespan of upholstered furniture depends on the quality of materials and construction. High-quality frames made from solid wood or hardwood will provide better support and last longer than those made from particleboard. Similarly, well-made cushions with high-density foam or a combination of foam and down feathers will offer superior comfort and retain their shape for years to come.

Beware of Bargains: While the initial cost of lower-quality upholstered furniture might be tempting, it may not be a wise investment. Cheaply made furniture can lose its shape and support quickly, leading to premature replacement.

Investment in Comfort: Consider upholstered furniture an investment in your comfort and well-being. High-quality pieces will provide years of enjoyment and can even become treasured family heirlooms.

Weighing the Options: Finding the Perfect Fit

Ultimately, the decision to choose upholstered furniture depends on your individual needs and lifestyle. Consider the following factors when making your choice:

  • Lifestyle: If you have young children or pets, a durable and stain-resistant fabric might be a wise choice.
  • Budget: High-quality upholstered furniture can be an investment, but it will last longer and provide superior comfort.
  • Maintenance: Consider how much time and effort you’re willing to put into cleaning and maintaining your furniture.
  • Style: Choose a style that complements your décor and personal taste.

Beyond the Basics: Furniture Upholstery as a Versatile Design Element

Upholstered furniture isn’t just about sofas and armchairs. It can be a versatile design element used to add comfort, texture, and visual interest to various areas of your home:

  • Dining Rooms: Upholstered dining chairs offer a more comfortable seating option compared to traditional wooden chairs, especially for long gatherings.
  • Home Offices: An upholstered desk chair can transform your workspace into a haven of comfort and productivity.
  • Nurseries and Playrooms: Upholstered ottomans or benches provide soft seating options for playtime or story time.
  • Entryways: An upholstered bench creates a welcoming spot to put on or take off shoes.
  • Bedrooms: Upholstered accent chairs in a corner can create a cozy reading nook.

The Green Factor: Sustainable Considerations

When choosing upholstered furniture, consider the environmental impact. Look for manufacturers who use sustainable materials like recycled wood for frames and eco-friendly fabrics made from recycled plastic or natural fibres like organic cotton or hemp.

Beyond Furniture: Upholstery isn’t limited to furniture. Consider reupholstering old chairs or ottomans to give them a new lease on life. This is a more sustainable and budget-friendly way to incorporate upholstered elements into your décor.

Conclusion: Furniture Upholstery – A Haven for Comfort and Style

Upholstered furniture offers a winning combination of comfort, style, and versatility. By considering the pros and cons, choosing the right materials and fabrics, and taking proper care, you can create a haven of comfort and style in your home that will last for years to come. Whether you’re looking for a plush sofa to relax on after a long day or a statement piece to add a touch of personality to your space, upholstered furniture has the potential to be the perfect fit.

For more information on The Pros and Cons of Furniture Upholstery contact Hill Upholstery.

10 Upholstery Tips

If you’re a beginner, I’ll share with you some upholstery tips that I learned during my time in upholstery classes here in Maryland. I had an excellent teacher that taught me a few things that I’ll pass on to you, in the hopes that you, too, will be able to upholster your own furniture (and save a bunch of money!).

Upholstery Tips #1 – Use Your Old Fabric As a Pattern

Okay, let’s start with the obvious. Even for people who are newbies, you may already know that the smartest thing you can do when reupholstering furniture is to save the old fabric that you remove (using a tack remover). When you save the old fabric, you’ve got the blueprint for the exact shape of the fabric that needs to go back onto your piece of furniture. I like to add a bit more of fabric just in case my fabric doesn’t cooperate or stretch the way the old existing fabric does. Add about 1/2″ extra around the perimeter of the old fabric. Use chalk to mark the fabric, which won’t permanently mess up your new fabric.

Just remember: you can always trim down excess fabric, but if you cut a pattern too small, you can never add extra fabric!

Upholstery Tips #2 – Easily Cut Straight Lines Without a Yard Stick

One of the hardest things when working with fabric is figuring out how to cut a straight line. Why is this important? Well, imagine reupholstery a chair and you need each piece of fabric to be 20″ x 20″. You can place a yard stick on the fabric and try to measure properly to get a right angle so that all the sides are straight, but from my experience, the likelihood of that happening is slim, especially if you’re a beginner!

Instead, use this trick that my upholstery teacher taught me:

STEP 1: Snip the edge of the fabric across the selvaged (fuzzy edges on the left and right side).

STEP 2: Pull the edges apart and find a loose thread.

STEP 3: Pull the loose thread, and move the fabric along the thread, creating a run in the fabric. Be careful not to pull too hard or else the loose thread may break.

STEP 4: Keep pulling the thread and cinching the fabric to create a longer run in the fabric.

STEP 5: Use your scissors or a rotary cutter to cut along the run. You will be guaranteed to have a straight cut across your fabric!

Upholstery Tips #3 – Find the Centre of Everything!

It’s tempting to just lay your fabric on your furniture that you’re reupholstering and just decide to….well, staple it in place as best as you can. But there is a method to how the professionals upholstery furniture:

They find the centre of everything.

That means that before they place fabric, they’ve located the centre of their furniture along the edge. They’ve found the centre of their fabric. And they strategically place all the materials for best results.
Here’s how to find the centre:

STEP 1: Measure the width of your chair’s edge. Divide the measurement in half and then mark the centre. (For example, if your chair’s seat is 24 inches wide, mark the chair’s edge at 12 inches in the centre).

STEP 2: Fold your fabric piece in half evenly to find the centre of your fabric. If you’re placing a special motif in the centre of your chair, be sure that the centre of your fabric is the centre of that motif. To mark the centre, fold your fabric at the halfway mark and snip your fabric’s edge at a slant. When you open the fabric up, you’ll get a nice little “V” at the centre of your fabric, with the “V” notch cut into the seam allowance of the fabric.

TIP: Make sure your “V” notch is small so that you don’t cut into the area of your fabric that will be visible once your furniture is upholstered.

STEP 3: Match up the centre of your chair to the centre of your fabric.

STEP 4: Place a single staple to secure the fabric to your furniture.

Upholstery Tips #4 – Start in the Middle and Work Your Way to the Sides

This tip is the next step to why you found the centre to your fabric and project.

When I first started upholstering furniture, I used to start stapling at the corners. I’d fold and staple the corners as neatly as I could, and then I would pull the fabric to the other corner, convinced I was doing it right.

But imagine my dismay when I’d look at my fabric and see that the pattern was crooked, stretched, lopsided, and looked bad. “What am I doing wrong?!”

What happened was that I wasn’t matching up the centre of my fabric with the centre of the chair (as mentioned in Tip #3). So while I thought I was starting in a good place (the corners), whatever placement of the fabric I thought I had positioned would get shifted out of place.

While this isn’t as big of a deal if you’re using solid fabric, this definitely won’t work with patterns or any fabric where you want to place a certain motif in the centre of your chair.

So instead of starting at the corner, start at the centre of your furniture, where you placed that single staple. Then, begin to pull towards the corners, making sure that all the wrinkles are pulled taut. This will guarantee that the carefully placed fabric, motif, or pattern, won’t shift while you’re pulling!

Upholstery Tips #5 – Use a Pneumatic Stapler Whenever Possible

If you’re a beginning DIYer, you might have an Arrow Fastener T50 heavy duty stapler like this one. These do and can work when doing simple reupholster projects like dining room chairs that just need a new layer of fabric.

However, if you’re planning to do lots of reupholstery projects, I highly recommend you buy a pneumatic stapler. These are what the professionals use and run on an air compressor.

Also, when building up lots of layers of fabric, lining, dacron batting, etc., small handheld staplers don’t go through all those layers into the wood quite as easily. So a pneumatic stapler is your friend. Whichever brand of pneumatic 22-gauge upholstery stapler you buy, be sure the tip allows you to get close to the edge of whatever you’re stapling. Some pneumatic staplers don’t allow you to get close to the edge.

TIP #6 – Pay Attention to What Gets Removed First, Second, Third

When I was reupholstering my wingback chair, one thing was very clear: pay attention to what gets removed first, second, third (etc.) The reason why is because how you remove parts of the chair will tell you how it should be put back together, and in the correct order.

For example, in the picture below you see that the fabric on the right was removed first, followed by the curve-ease (the metal strip that holds the outside fabric in place), then the cording, and then the fabric on the left.

When the chair is upholstered, you’ll put it back together again in the opposite order.

TIP: I always recommend taking lots of pictures and videos before and during the process so you can look back on it while you’re working!

TIP #7 – The “Pinch Test” is Your Friend

How do you know if you upholstered a piece of furniture properly? Well, one clue is how many wrinkles you have. Lots of wrinkles means you didn’t pull your fabric tightly enough around the piece of furniture. Sometimes they’re clearly visible, but other times, it looks smooth, but still has some slack.

The best way to test this is what my upholstery teacher called the “pinch test.”

TIP #8 – Hire Professionals to Make Your Upholstered Buttons

Most craft stores sell button kits that allow you to make your own DIY buttons. But honestly? They’re pretty cheap and don’t look that great. They’re good in a pinch. But if you’ve got professional upholsters nearby, hire them to create your upholstered buttons. They’ve got professional button machines that can create amazing buttons. Take them some of your fabric and they’ll create them for you. Not only will they last longer but they’re look better. I think I paid about $2.00 per button.

While this can be expensive if you’ve got a large tufted piece of furniture, but you’ll get better results. Who doesn’t want that?

TIP #9 – Don’t Be Afraid to Use Tack Strips

Tacks are hard to use because they often are crooked, irregularly spaced, and–well, just difficult to hammer in consistently. Don’t be afraid to use tack strips, which are one long strand of perfectly spaced tacks. All you’ve got to do is nail them into place. It also helps keep kids from pulling them out! (Ask me how I know this….LOL).

If you do decide to use individual decorative tacks, order them from Amazon, and buy more than what you think you’ll need (believe me–you’ll ruin some of them while hammering them in). Use a piece of cardboard as a template for keeping them straight, with slits about 1/2″ apart.

While they still won’t be perfect, this does help! Have a good tack remover on hand so that you can easily remove any that get bent or uneven.

TIP #10 – Snip and Fit Your Fabric Around the Furniture’s Hard Edges

What I have learned about upholstery is that the difference between the professionals and the beginners is the ability to fit the fabric around the fixed parts of furniture, like a glove. They know exactly where to snip and fit, where to pull, and how to staple it into place for best results.

Remember from TIP #3 and #4 how you should find the centre of the fabric and match it to the centre of edge of the chair? How you’ll start with a single staple in the middle and then pull tight to the corners?

Well, you must pull out the slack from the fabric first and then snip while fitting the fabric around the furniture.

For example, when I reupholstered two dining room chairs in gorgeous velvet, I pulled the fabric taut, then snipped carefully around the chair legs, securing the fabric in place with staples, and then folding the edges of the fabric up to create a beautiful profile around the legs.

If I had snipped and then pulled tight, the cut would have been misaligned.

For more information on Upholstery Tips contact Hill Upholstery.

The original version of this article was published in thriftdiving.com

How to Clean Upholstery

Upholstery is an art that has brought new life to old pieces of furniture for centuries, and it’ll likely continue for many years to come. Not only does the practice of fitting padded textiles to chairs and sofas give you a unique one-of-a-kind piece – it’s also very environmentally friendly! There are many benefits to getting your furniture reupholstered, but making the most of your new and improved decor does require some upkeep. Upholstered furniture is prone to getting dirty and dusty regardless of how much it is actually used and cleaning it is the only way to prevent cobwebs, crumbs, and pet fur from piling up. Plus, a clean piece of furniture will keep your allergies at bay and stop stains from spoiling the look of your precious family heirloom. If your upholstered furnishing is due for a cleaning, but you don’t know where to start, you’re in luck because today we’re going over the ins and outs of how to clean upholstery!

Step 1: Vacuum
The first step to a thorough upholstery cleaning is getting your hands on a good vacuum and using its attachment to suction out unwanted dirt and debris. Use short, overlapping strokes and make use of the brush on the attachment to loosen up any crumbs that have gotten into the crevices of your upholstery. Also, be sure to clean areas that may not be seen at first glance – lift up the cushions, remove them if you can, and vacuum both front and back. That’s the only way to ensure crumbs, pet hair, and dirt don’t settle into your furnishing and become a permanent fixture!

Step 2: Wipe Down Wooden or Metal Areas
To keep your upholstered furniture in tip-top shape, it’s important to also take care of the areas that don’t have any upholstery on them. Wipe down the feet of your sofa and any other areas that are made of wood or metal with a solution containing warm water and liquid dish soap. Gently work away on the frame of your furniture and be careful not to soak it – you just want to get rid of stains or residue, not scrub away at its finishing.

Step 3: Remove Stains
To remove stains from your couch or chair without compromising the state of the upholstery, you’ll need to look at the fabric care codes to see what’s safe to use on the material:

  • WS: This code means your fabric can withstand either water- or solvent-based cleaners.
  • W: Material with the care code “W” can be cleaned using water-based cleaners.
  • S: Only solvent-based cleaning chemicals should be used on upholstery with this code.
  • X: Fabric that falls in this category should only be cleaned with a vacuum, and no water can be used.

Here are some homemade cleaning solutions you can use and the upholstery material they are best equipped to clean:

  • Synthetic upholstery: 1 cup warm water, ½ cup vinegar, and ½ tablespoon liquid dish soap.
  • Fabric upholstery: ¾ cup of lukewarm water, ¼ cup vinegar, and one tablespoon dish soap.
  • Leather upholstery: ½ cup olive oil and ¼ cup vinegar.

All three of these solutions can be mixed in a spray bottle and spritzed on to the stain. Gently scrub the stain away with a soft cloth until it is completely gone.

Step 4: Give Your Furniture A Good Sudsing
Next, give your upholstery a thorough cleaning by sudsing it (*note: this step should only be done if your upholstery contains the code W or WS). Pour out half a teaspoon of clear dish soap into a bowl and run warm water on top of it to create suds. Lightly dip an upholstery brush into just the suds and go over the fabric in small sections. Once all of the upholstery has been sudsed, use a clean damp cloth to wipe it down.

Step 5: Dry and Do You
That’s it! Now all that’s left to do is let your upholstered furniture dry and flaunt its beauty to future guests!

For more information on how to clean upholstery contact Hill Upholstery.

The original version of this article was published in www.prestigedecor.ca

Upholstered Footstools, Ottomans and Hassocks

There are some pieces of furniture that are simply workhorses in your room because they can be used in so many different ways. Upholstered Footstools, Ottomans and Hassocks fall into this category. But is there a difference between these three pieces of furniture? The simple answer is — not really. They are all small pieces of furniture whose purpose is to provide a spot to rest your feet. That being said, ottomans tend to be larger and are often used in lieu of a coffee table; a hassock is smaller and rounder and a footstool is usually a bit lower to the ground and smaller in size. Let’s take a look at the various ways these furniture pieces can be put to work.

Ottomans

It is common to find an ottoman used as a coffee table. They can be made into any shape including round, square and rectangular. The legs can be fitted with casters allowing you to move it out of the way or around the room as necessary. Placing a tray on top of the ottoman will provide a spot set a drink glass or to corral all those necessary items such as eyeglasses, books and the ever present remote. The top can be removable, exposing lots of storage space for extra blankets, magazines etc.

This trend of using an ottoman in place of a coffee table will work in any interior. A tufted velvet ottoman with brass casters is lovely in a traditional setting. For a contemporary space, a sleek black leather ottoman on polished chrome legs fits the bill. In a country, eclectic or transitional interior, choose a fabric that coordinates with other fabrics and colours in the room for a coordinated look.

Hassocks

Really just another term for an ottoman, a hassock is generally a bit smaller in size and is often round in shape. These, too could be used as an end table by placing a piece of glass on top. You may consider sliding two hassocks under a console table for use as extra seating when needed. Placing one in front of a fireplace provides a nice spot to warm your toes without taking up too much space. Like ottomans, they can be upholstered in any fabric of your choice.

Footstools

A footstool’s sole purpose is to provide a spot to rest your weary feet. They sit low to the ground, ranging from 9-12″ in height and 12-15″ deep. They can be placed directly in front of a chair, sitting between two occasional chairs or up against a wall holding books until they are needed. Since they are so small you can upholster them in a fabric that you would not want to use in large volume such as an animal print, a bright colour, a custom needlepoint etc. Have fun with these.

Tassel trim, braid, gimp and nail heads can all be used to embellish your footstool, ottoman or hassock to add a unique look to your home.

For more information about Upholstered Footstools just contact us.

The original version of this article was posted on www.onlinefabricstore.com

Five Upholstery Nightmares And How To Solve Them

As an upholsterer – whether you’re just starting out or have been at it for years – there are some things you come across that will cause your heart to sink. Unfortunately, no one is immune to the upholstery nightmares that lie beneath the surface or the hidden secrets that spell upholstery hell. Here are the five discoveries that strike fear every time!

Moths

They may look harmless, but when you see these tiny, winged creatures come into contact with fabric, it’s a catastrophe. As an upholsterer, an infestation of moths is possibly the most disappointing upholstery nightmares. If there was any part of the piece you’re working on worth saving, the appearance of moths means it all has to go. Sadly, you can’t take the risk of leaving anything other than the frame intact, so everything else needs to be ripped off and got rid of.

Thankfully, I’ve only had one completely disastrous run-in with moths in eight years, but it does surprise me how many households still suffer with them. Clothes moths mainly feed on wool clothing, carpets, and rugs and, of course, upholstered furniture. They will also feed on synthetics or cotton blends but are less attracted to manmade fabrics such as polyesters and velvets. Damage most likely appears in hidden locations like crevices and in between cushions. When they take grip, it’s a disaster!

The only solution is to strip everything away and let the bare frame sit. When you’re sure there’s no evidence of moths or their larvae left, the piece needs to be professionally fumigated. What a palaver!

Woodworm

Next up on the list of upholstery nightmares you really don’t want to come across is another small but sinister creature – woodworm. An infestation of woodworm (the wood-boring larva of the furniture beetle) is relatively easy to spot as they leave a mass of tiny holes in the wood when the adults mature and fly away. If they’ve got into the joints, you may find that the frame is wobbly too. One way to spot if they’re active is to hit the wood. If a flurry of fine sawdust comes out, there’s a good chance they’re still busy!

Chemical treatments involve injecting each and every hole. When purchasing and bringing old furniture into your home, check it over for indications of a woodworm infestation and ensure that it has been treated to drive out any remaining larvae and make it harder to take hold in the future. Older pieces of furniture that may have been subject to woodworm attacks in the past may need joints securing by drilling out and replacing dowels.

Bodge Jobs

I’m fully supportive of anyone having a go at basic upholstery themselves, but it’s important to know your limits and when to call in a pro. Bodge jobs, badly executed repairs and a lack of knack can create big upholstery nightmares. I’ve come across all sorts of unbelievable cock-ups and makeshift solutions. People that use plywood instead of webbing, for instance – a common quick fix that does NOT make for a comfy landing.

The trouble is that some chairs that have been done up look innocent enough from first inspection, but undercover all sorts of problems can be waiting. Having to fix issues, take away what’s not right and re-tread old ground is one of the most frustrating upholstery challenges of all.

Wonky Webbing

Just because you don’t see it, doesn’t mean it should be disregarded. For me, I always make sure every project I work on looks as good on the inside as it does on the outside. In other words, get the foundations right before you even begin to think about anything else. When it comes to webbing, it’s so common to see a poor job and people don’t use enough. Sometimes I see it and wonder how the entire seat hasn’t fallen through.

These days, I’m coming across more and more elastic webbing and I have to say I’m not a fan. In my opinion, there is nothing as reliable as good old black and white, jute, herringbone webbing. And don’t scrimp on it! A decent, structured webbing base will make all the difference between a chair you sit ‘in’ and a chair you sit ‘on’. And elastic webbing? Forget it!

Metal Back Tack (AKA Ply-Grip)

Fixed with staples to fold fabric back over and create a blind seam, you may love Ply-grip, but I think its lethal! Like dealing with shark’s teeth, it’s a beast to come up against. While it may apply nicely, it creates a nightmare for anyone having to strip it away down the line. Not only does Ply-grip bruise velvet, you have to give the piece a real whack to fix it and it’s vicious stuff. Call me old-fashioned, but I always favour a slip stitch. And that’s the kind of satisfying process that definitely won’t give you nightmares!

The original version of this article can be found at www.vintiqueupholstery.com

Cushion reupholstery

When you pay a lot of money for your sofa and chairs, you expect them to last. However, we have had many customers come to us after spending large amounts of money on a sofa to find that 12 months down the line, they are no longer comfortable – or guaranteed! This is why our team at Hill Upholstery & Design spend time being asked to complete cushion reupholstery for people in Essex and London so that their expensive suite is back to the same quality they would expect – and with a much longer guarantee!

Are you unhappy with how your expensive sofa cushions are now looking? Contact Hill Upholstery & Design today to see how our team can bring your sofa and suite back to life!

You can see just some of the transformations we have completed on our cushion reupholstery case studies page.

Take a look at the video below where we reupholstered cushions from a leather sofa for one of our clients.

“OK, so here we have the cushion from lovely leather settee the settee is only a year old unfortunately the guarantee doesn’t guarantee the cushions – funny that – but inside this cushion – the lady has paid a lot of money for this settee – are springs which are a very poor quality and they seem to have collapsed making the cushion collapse, making it very uncomfortable, so we are going to replace that with reflex foam which has a 10 year guarantee on it. We have formed it to make it a nice shape and that will make her sit comfortably for at least 10 years.”

cushion reupholstery

Caring for your sofa

Our 5 Top Tips

YOUR sofa was a big investment so it stands to reason you want it to always look its best and get as much life out of it as you can. So here are Hill Upholstery & Design’s top tips to do just that…

Tip 1. It’s time to get plumping – Because your sofa cushions are made of soft materials (and because they continually get squished by our backsides) they need to be reshaped regularly. You should take them off, give them a whack and a squeeze until the cover is filled out and the proper shape has returned.

It’s up to you how often you do this as your eye will be the best guide, but we suggest you do it at least once a week.

Tip 2. It looks flippin’ great – It will also help boost the longevity of your sofa to rotate/turn your cushions every now and then. This helps top stop signs of wear and tear emerging because of always sitting on the same bit of fabric. We think flipping the cushions at the same time as your plumping would make sense.

Tip 3. Vac to the future – While you’ve got all the cushions off your sofa to plump and flip them, it is a good opportunity to give them and the rest of the sofa a quick once over with your vacuum cleaner. Dust and debris can build up regularly with lots of hiding places in your average sofa, so a regular hoover will help keep it clean, reduce scratching, pulls or pilling and cut the chance of bad odours taking root.

Also, the dust can weaken the fibres in your sofa, so it is best to get rid whenever you can. We suggest you do this at least once a month, but more often if you are able to.

Tip 4. Another fine mess – No one ever spills drink or food onto a sofa on purpose, but it sometimes happens. So what to do? Well, clean them immediately as stains are harder to remove once they set it. Wipe spills away, do not rub, with a dampened sponge. If you know what you’re doing, use an upholstery cleaning product specifically suited to your sofa to remove any determined stains. But if you’re not sure, seek advice from a professional. Using the wrong cleaner could make the problem a million times worse.

Tip 5. It’ll all come out in the wash – Like a teenage son, you should force your sofa to have a proper, all-over clean at least once a year. But as with stain removal, only do it yourself if you know what you are doing or will be able to accept the consequences of getting it wrong. A leather sofa won’t necessarily like a cleaner/detergent aimed at fabric sofas and vice versa. The best option is to hire a professional cleaner to come and do the job. Obviously it won’t be as cheap as doing it yourself, but you’ll get a much higher standard of work.

Bespoke sofa manufactured

More top tips:

If possible, keep your furniture out of direct sunlight as over an extended period of time it can cause fading and weaken the fabric.

Pet hair and the oils contained within them can cause stains and bad odours. The regular cleaning of your sofa will help reduce this, but having a blanket for your pet to sit on top of the sofa fabric is an easy solution.


If you have any questions about sofa care or anything about helping your furniture stay at its best, then get in touch with us here at Hill Upholstery & Design.